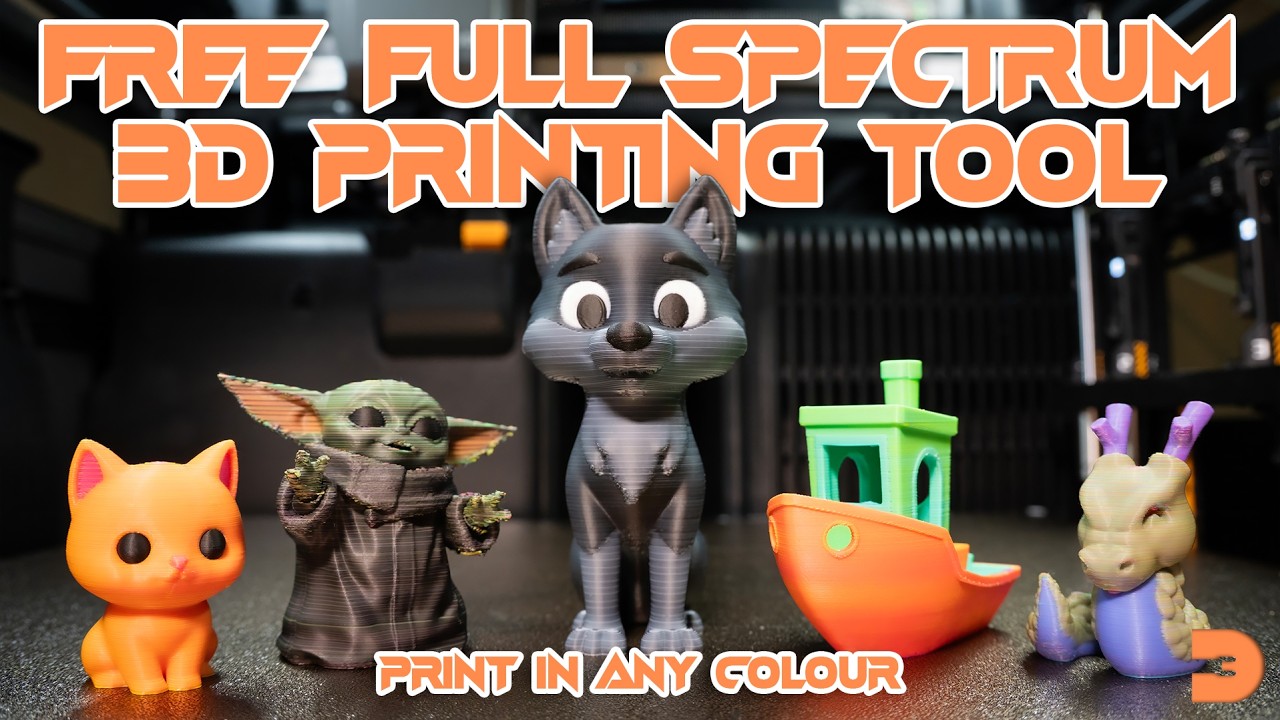
Paint any colour onto a 3D model and export as a dithered multi-material 3MF for FDM printing — or as solid colours for normal multi-colour printing.
📐 Step 1 — Load & Orient
- Drag an STL or 3MF file onto the viewport, or click the upload area.
- Use the Orient button to click a face that should sit flat on the build plate.
- Use Scale to resize the model if needed. Apply photo projection before scaling for best results.
🎨 Step 2 — Paint
- Pick a colour from the colour picker.
- Use Brush, Sphere, Fill, Gradient, or Photo to paint your model.
- Ctrl+Z / Ctrl+Y to undo/redo. Set a Base Colour for unpainted faces.
⚙️ Step 3 — Process & Export
- Choose a Filament Mode — WKCMY gives the best colour range (5 filaments).
- Click Process to generate the 3MF.
- Click the Download button in the viewport.
🖨️ Step 4 — Slicer Settings (for dithered export)
Import into Bambu Studio or OrcaSlicer. Use these settings:
0.08 mm0.20 mm(or 0.16mm if issues)Assign filament slots to match your export mode (Cyan, Magenta, Yellow, White, Black).
Brush
Left-click and drag to paint visible faces. The BFS brush spreads along the surface within the radius, staying on the same surface (won't bleed around corners). Adjust radius with the slider.
Sphere Brush
Paints all faces within a 3D sphere radius, including through the model. Useful for painting hollow or complex geometry. Adjust radius with the slider.
Fill
Connected mode: flood-fills all connected faces of the same colour. Angle Limit mode: fills faces within an angle threshold — great for painting a single flat surface.
Colour Picker (Eyedropper)
Click any face to sample its colour into the active paint colour.
Base Colour
Sets the colour for all unpainted faces. "Reset all to base" clears all painting.
Whole Model mode
- Select gradient colours (From / To) using the colour swatches.
- Set Direction using the Rotation and Pitch sliders. The purple arrow in the viewport shows the direction.
- Use the Centre slider to shift where the mid-point of the gradient sits.
- Adjust Steps to control how many discrete colour bands the gradient uses.
- Click Apply Gradient.
Selection mode
- Switch to Selection mode in the gradient panel.
- Use the Brush or Fill sub-tool to select the faces you want to gradient.
- Click on the model to set your Start point, then click again for the End point.
- Click Apply Gradient.
The gradient tool automatically switches back to the Brush tool after applying.
How to use
- Select the Photo tool from the tool panel.
- Click Load Photo and choose a JPG or PNG. Transparent PNG backgrounds are respected.
- Position, resize, and rotate the photo overlay in the viewport so it covers the area you want to paint.
- Choose Whole Model (paints all visible faces) or Selection mode (only selected faces).
- In Selection mode, use the Brush or Fill sub-tool to select the hull faces you want to paint first.
- Click Apply. Filament mode auto-switches to WKCMY for best results with photos.
⚠️ Limitations
Curved surfaces work best. The photo tool maps colours onto individual triangles using a camera projection. On a model with many small triangles (like a curved hull), the result looks excellent. On a perfectly flat surface with very few triangles — like a basic cube face with only 2 triangles — the resolution is limited to a few samples per face.
Apply photo before scaling. If you scale the model after applying the photo, the per-layer export colours will fall back to the face average colour (still correct, but without the fine per-layer variation).
Use WKCMY. Photos contain neutral greys, whites, and blacks that CMY alone can't reproduce well. WKCMY uses white and black filaments to handle these tones accurately.
Bright, high-contrast photos print best. The dithering works on colour differences — a washed-out or grey photo will print as grey.
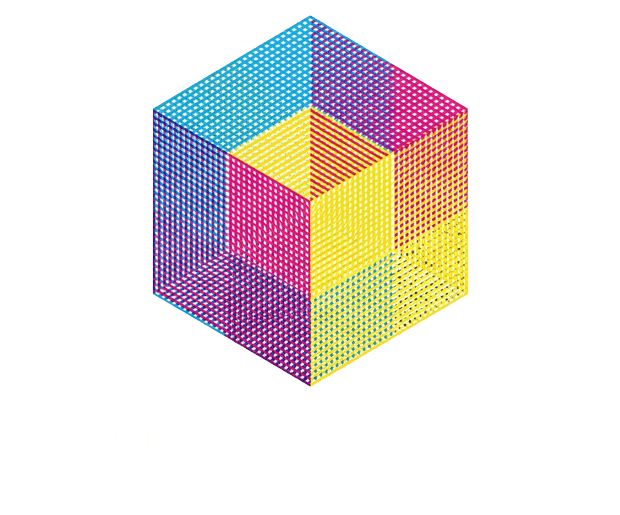
Dithered export (CMY / WCMY / KCMY / WKCMY / 2-Filament)
The model is sliced into 0.08mm layers and each layer slice is assigned a filament (Cyan, Magenta, Yellow, White, Black). The alternating filament lines optically mix to produce your painted colours. Requires specific slicer settings — 0.08mm layer height, filaments assigned in the correct order.
CMY — 3 filaments, best for vibrant colours with a white printer base.
WCMY — 4 filaments, adds white for cleaner pastels and highlights.
KCMY — 4 filaments, adds black for richer darks.
WKCMY — 5 filaments, best overall accuracy.
2 Filaments — dual nozzle, dithers between two chosen colours.
Solid Colours — No Dithering ✦
Exports each painted face as a solid flat colour. This is NOT the dithered colour-blending export — it's for use with normal multi-colour FDM printing. Use this if you want to paint your model and print it on a multi-filament printer (like a Bambu AMS) using standard solid filament colours, without any CMY dithering. No special slicer settings required.
The Palette Size option reduces all painted colours to a fixed number using colour clustering (k-means). Set this to match the number of filament slots in your slicer — e.g. choose 8 colours for an 8-slot AMS. Colours are automatically merged toward their nearest neighbours so the most visually distinct colours are preserved.
Re-importing into Primed3D: The Solid Colours export also works as a project save format. Export as Solid (Full Spectrum), then re-import the resulting .3mf into Primed3D to continue editing — all your painted colours are preserved on the faces and can be further refined with the brush, gradient, or photo tools before re-exporting as a dithered CMY version.
Filament Colours
Use the 🎨 Filament Colours button to set the actual hex codes of your filaments. This only affects how the slicer preview displays — the dithering ratios themselves are always computed using ideal CMY theory regardless of your specific filament brand.
A 3D Revolution Tool

Terms of Use
About Primed3D
Primed3D is a free, open-source tool created and shared with the 3D printing community by Josh at 3D Revolution. It is provided as-is, free of charge, for personal and commercial use.
Your Privacy & Data
Everything happens in your browser. Primed3D runs entirely client-side — your STL files, painted models, and exported 3MF files are never uploaded to any server. No data leaves your device at any point. There are no accounts, no tracking, and no analytics. Your files stay yours.
Open Source
Primed3D is released as an open-source project. You are free to use, modify, and share it. If you redistribute or build upon it, please credit the original project and its creator.
No Warranty
This tool is provided without warranty of any kind, express or implied. The creator is not liable for any damages or issues arising from its use, including but not limited to failed prints, material waste, or printer issues. Use at your own discretion.
3D Printing Results
Print quality depends on many factors outside the control of this tool, including your printer, filament, slicer settings, and model geometry. The colour dithering is an approximation — results will vary between setups. The recommended slicer settings are a starting point, not a guarantee.
Third-Party Services
Primed3D itself does not connect to any external services. Optional links to YouTube and Buy Me a Coffee are provided for convenience and open in new tabs — they are governed by their own terms and privacy policies.
Primed3D — A 3D Revolution Tool
Thanks for using Primed3D! 🎉
I hope you found it useful! Primed3D was created by Josh at 3D Revolution.
▶ Subscribe to 3D Revolution for tips, tutorials, and more tools.
If you'd like to say thanks or support the project, the best way is to become a channel member — or if you'd prefer, buy me a coffee ☕